Camera
A non-destructive camera: pan, zoom and rotation plus lens and film effects, every value keyframed on its own track.
What it is
The camera applies a pan, zoom and rotation to the whole frame, on top of your layers, and can add lens and film looks with the Effects sliders: fisheye, film grain, chromatic aberration, vignette and handheld shake. It is non-destructive - your keyframes are never changed - and it is applied to the preview and to exports alike.
While a Color layer is selected the camera steps aside and the panel locks, so dots land exactly where you click. Switch back to a normal layer and the camera returns, keys intact.
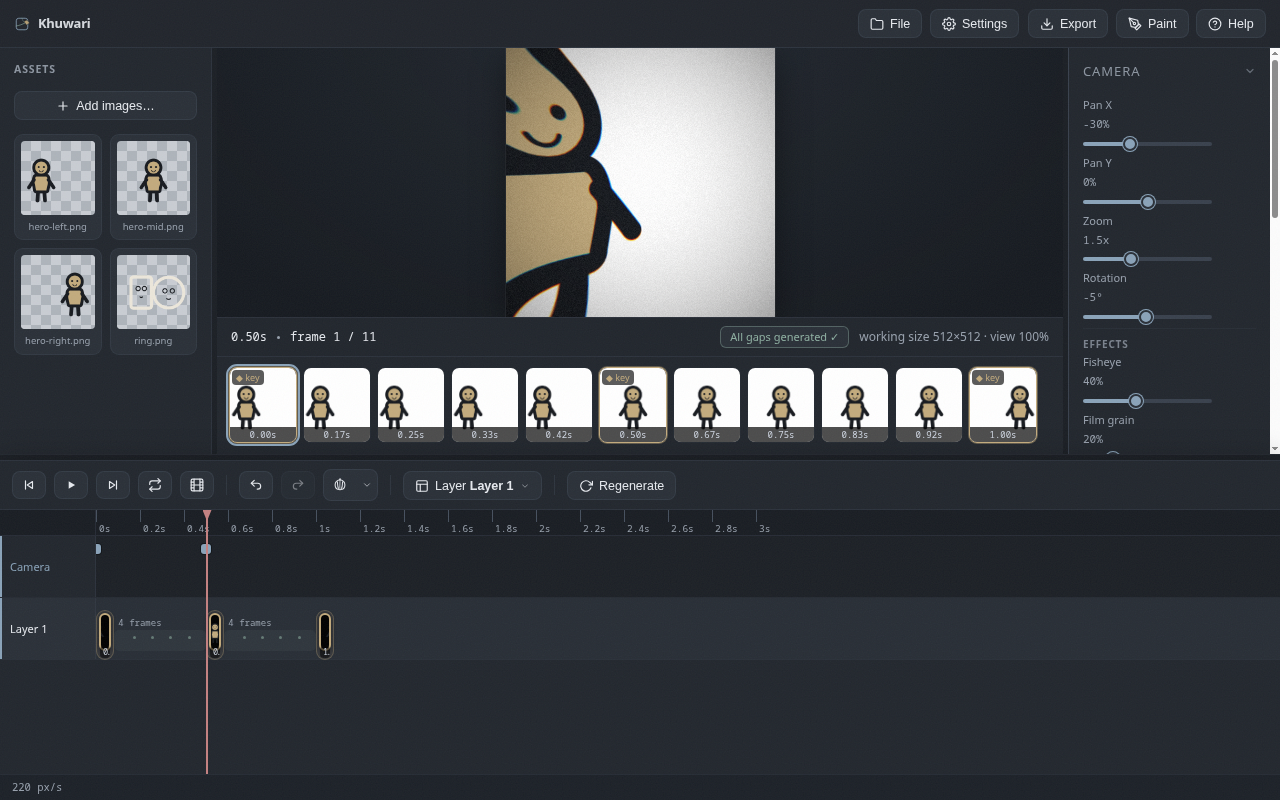
Add a camera key
Open the Camera panel at the top of the right panel and move to the moment you want.
- Move the playhead to where the change should start.
- Drag any of the Pan X, Pan Y, Zoom, Rotation or Effects sliders.
- A camera key appears at the playhead. The first key is remembered for the whole timeline, so the pose holds before your camera moves.
You can also press Add key to stamp a key with the current values when you want the pose to stay readable.
The Camera track
The timeline has a Camera row under your layers. Each key is a small dot:
- Drag a dot to retime it.
- Double-click a dot to remove that key.
- With the playhead on a key you can nudge the sliders to edit it, or press
Remove key.
The Effects sliders
Five effects sit under the transform sliders, each with an intensity from 0 (off) to 100 percent. Like every camera value, the intensity is remembered per key and blends between keys, so you can ease an effect in or out over time.
- Fisheye warps the frame outward like a wide lens, magnifying the centre.
- Chromatic aberration splits red and blue along the edges for a cheap lens look.
- Film grain adds a seeded speckle over the whole frame.
- Vignette darkens the corners to focus the centre.
- Handheld shake adds a smooth, low-frequency wobble to the frame for a real-camera feel, and the Shake speed slider right below it tunes how quickly it wobbles - a slow drift up to an energetic handheld look.
Grain and shake are deterministic: the same frame always renders the same way in the preview, the filmstrip and your exports.
Between keys
Every camera value, transforms and effects alike, blends smoothly from key to key. A slow push-in is just two keys: one at normal zoom, a later one zoomed in. Easing a fisheye in from a punch-out is two keys too. Space your keys on the timeline to shape the easing of the movement.
Applied to exports
The camera is part of the final composite, so every exported frame includes it, lens effects and all. Combine it freely with squash, motion blur and color layers exactly like the rest of the frame.